How to Edit Videos with Adobe Premiere Pro: A Step-by-Step Guide

Are you excited to dive into the world of video editing? Adobe Premiere Pro is your ultimate companion on this creative journey.
Whether you’re a beginner or an experienced content creator, this powerful software can transform your raw footage into captivating videos.
This step-by-step guide’ll walk you through editing videos using Adobe Premiere Pro. Let’s bring your vision to life!
Content
Getting Started with Adobe Premiere Pro
Before we jump into the editing process, let’s make sure you have everything set up and ready to go.
1. Install Adobe Premiere Pro
If you haven’t already, head to the Adobe Creative Cloud website and install Adobe Premiere Pro. You can subscribe to the software or opt for a trial version.
2. Import Your Footage
Open Adobe Premiere Pro and create a new project. Then, import your video clips, audio files, and any other media assets you’ll be using in your project.
The Editing Process: Step-by-Step
1. Organize Your Media
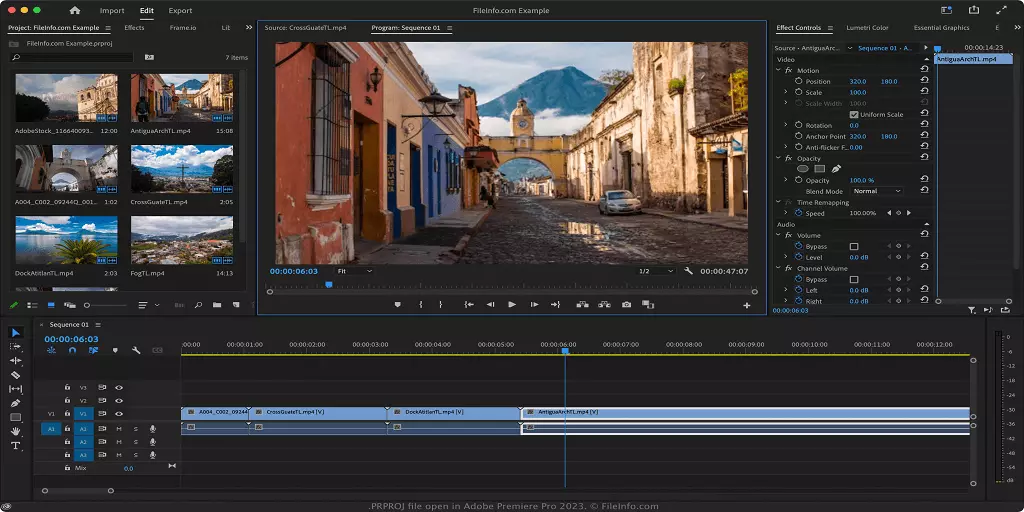
In the “Project” panel, create folders to organize your media assets. This makes it easier to locate and use them in your project.
2. Create a Sequence
Right-click on your video clip in the “Project” panel and select “New Sequence From Clip.” This creates a sequence that matches your video’s settings.
3. Basic Editing
Drag your video clip to the timeline. Use the “Razor” tool to trim unwanted sections. To split a clip, position the playhead and press “Ctrl + K” (Windows) or “Cmd + K” (Mac).
4. Adding Transitions
Open the “Effects” panel and search for transitions like “Dissolve” or “Wipe.” Drag and drop the transition between two clips on the timeline.
5. Applying Effects and Adjustments
Enhance your video with effects. Use the “Effects Control” panel to adjust parameters like brightness, contrast, and saturation.
6. Working with Audio
Drag your audio files to the timeline. Adjust audio levels by clicking and dragging the audio track’s line up or down. To remove background noise, use the “Noise Reduction” effect.
7. Adding Titles and Graphics
Open the “Graphics” workspace and use the “Type” tool to create titles. Customize font, color, and size in the “Essential Graphics” panel.
8. Export Your Video
Once you’re satisfied with your edits, it’s time to export. Go to “File” > “Export” > “Media.” Choose a format, preset, and destination for your final video.
FAQs
Is Adobe Premiere Pro suitable for beginners?
Absolutely! While Adobe Premiere Pro offers advanced features, it’s designed for users of all levels. The intuitive interface and vast online resources make learning the software enjoyable.
Can I use keyboard shortcuts in Adobe Premiere Pro?
Yes, Adobe Premiere Pro offers a range of keyboard shortcuts to speed up your editing process. You can find a list of these shortcuts within the software or online.
Pro Tips for Video Editing Success
- Master Keyboard Shortcuts: Learning shortcuts can significantly speed up your workflow.
- Storyboard Before Editing: Plan your video’s structure and shots before diving into editing.
- Regularly Save Your Project: Video editing is time-consuming; save your progress frequently.
- Experiment with Effects: Don’t hesitate to try different effects to add a unique touch to your video.
Conslusion
With Adobe Premiere Pro, your video editing skills are about to skyrocket. From basic trims to advanced effects, this software empowers you to create content that stands out. So, grab your footage, unleash your creativity, and let Adobe Premiere Pro be your canvas for visual storytelling!

Leroy Allen is a blogger with a passion for technology who has been writing about the latest in the world of gadgets and gizmos. They are an avid reader of Science-Fiction novels and love to spend time with their wife and kids.


